Tuesday, February 27, 2018

A Note To Say Thank You...

Hi everyone, I'm so glad you've stopped by today!  I'm sharing a quick card I made for the Tim Holtz Stampers Anonymous Booth at Creativation 2018.
I absolutely love this Glorious Bouquet stamp set and suspect I'll be using it frequently.  The large floral is SO big, it comes with it's own acrylic block.  You can use the entire floral image for a large project or isolate a particular portion for something smaller.

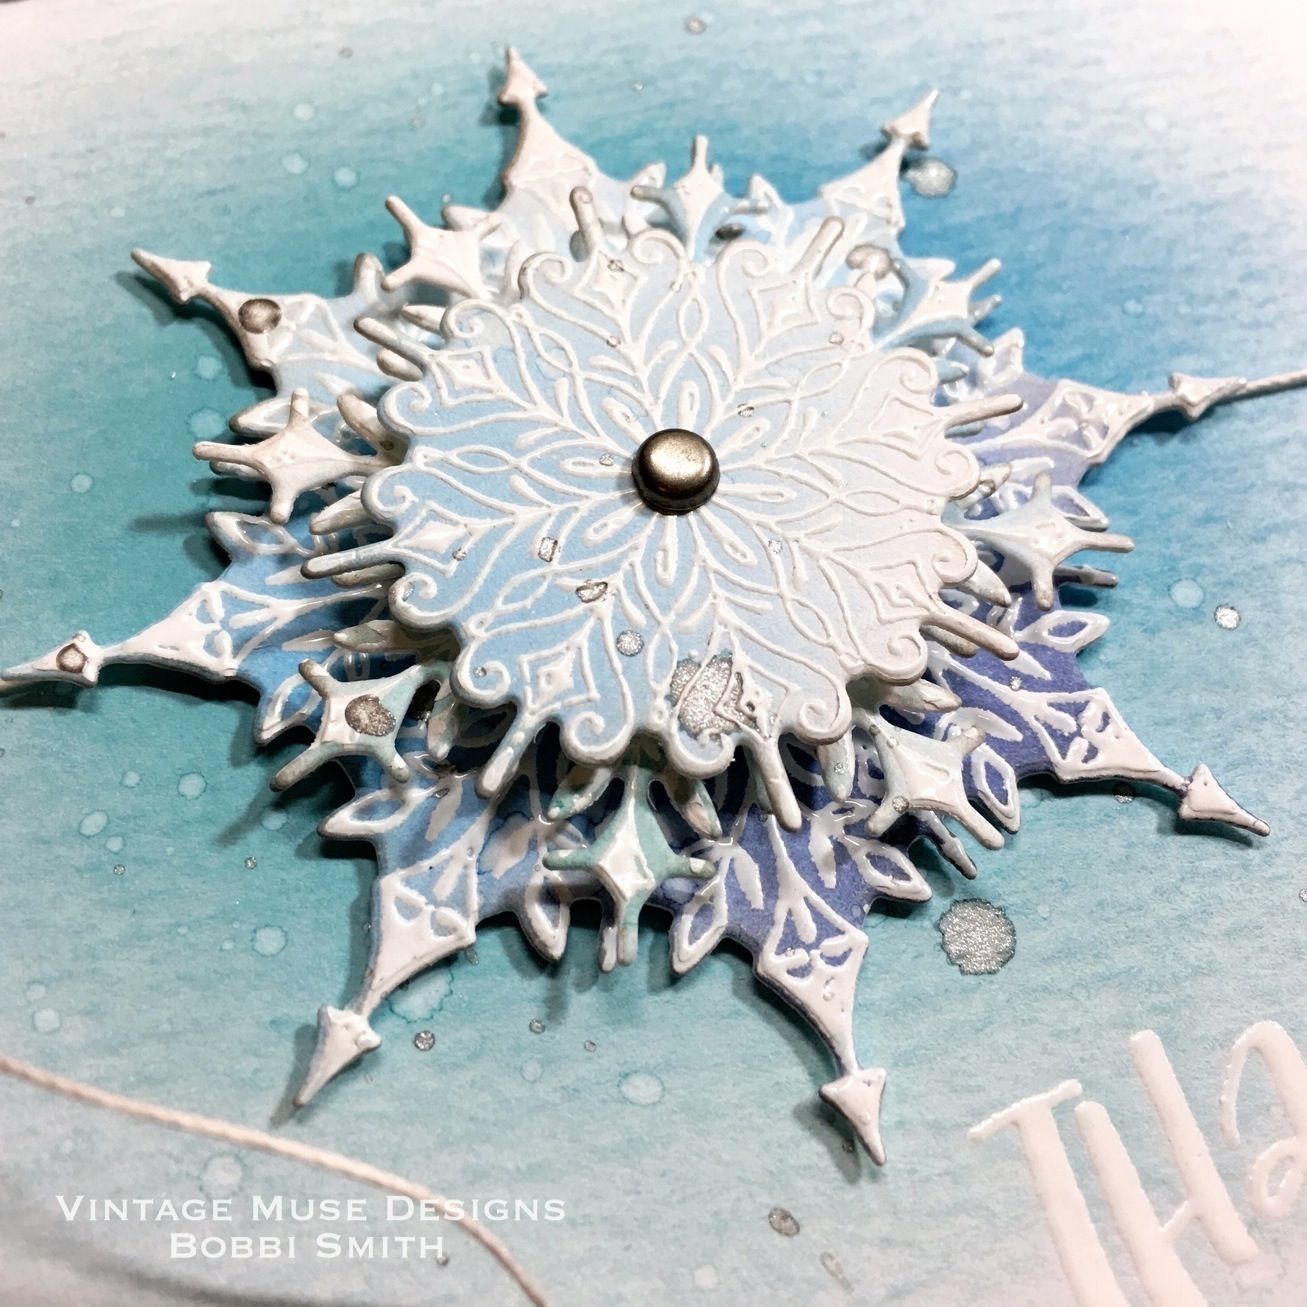
Let me walk you thru how I put this card together.  To start, stamp a portion of the floral image onto black cardstock panel using distress embossing ink.  Then sprinkle generously with super fine white embossing powder and shake off excess.  Melt the embossing powder with a heat tool.  I didn't use a smooth cardstock, so you can see the texture that the stamped image picked up.  I think it adds a little interest to the card, but stamping on smooth cardstock will eliminate that crosshatch pattern.
 Stamp the greeting on a scrap of vellum using black soot archival ink.  Working quickly while the ink is still wet, sprinkle clear embossing powder on stamped greeting.  Shake off excess powder and heat till embossing powder melt.  I sew vellum to the panel and trimmed down excess.  I really like the translucent quality to the vellum, so you still see the muted floral in the background.
Distress the butterfly adornment with picket fence distress paint, then attach to panel with distress collage matte medium.  Layer the stamped panel to a white card panel, then silver kraft panel to the black cardbase.
I hope you give it a try.  You can find the supplies I've used via the links below.  I'll be back soon to show you another project from Creativation 2018.  Have a wonderful day!

Bobbi

I've listed the products below, used to create this project.  I am part of various affiliate programs including Simon Says Stamp.  When you click on an affiliate link and make a purchase (at no extra cost to you), I receive a small commission.  Thank you, I genuinely appreciate your support!

Friday, February 23, 2018

Blessed Are The Curious...

Hi everyone, thanks so much for stopping by today!  I'm back today, sharing another fun card I made for the Tim Holtz Stampers Anonymous Booth at Creativation 2018.  For this card I used the bicycling trio from Tim Holtz "Theories" stamp set as my focal point.
To start I applied a thin layer of gesso to a 4 1/4 x 5 1/2 sheet of distress mixed media cardstock.  After dried I used several of the mini layering stencils from set 33 & 34, in combination with some bright colors of distress paints to create a fun mixed media background.
I adhered some vintage book paper to a strip of distress mixed media cardstock, then applied a wash of gesso.  I tied it off with a little Tim Holtz black craft thread.
I just love the scribble style to this stamp set, I will definitely be incorporating it into my art journal!  I stamped the bicycle image and phrase onto the smooth side of distress watercolor cardstock, using black soot archival ink.  I trimmed all paper pieces down to fit kraft A2 cardfront.  I layered with black classic kraft cardstock.
To finish it off I attached idea-ology star brads and an arrow wrapped with a little more black craft thread...after I had distressed them with a little mushroom alcohol ink.
 
I hope you give it a try.  You can find the supplies I've used via the links below.  If you have any questions please let me know I love your kind comments, I truly appreciate each and everyone of them!  I'll be back soon to show you another project from Creativation 2018.

Bobbi

I've listed the products below, used to create this project.  I am part of various affiliate programs including Simon Says Stamp.  When you click on an affiliate link and make a purchase (at no extra cost to you), I receive a small commission.  Thank you, I genuinely appreciate your support!

Monday, February 19, 2018

Winter Thank You Card w/ Ranger Ink...

Hi everyone, thanks so much for stopping by today!  I have a guest tutorial post to share with you over on the Ranger Ink blog.  I'll show you step-by-step how I created this fun Winter Thank You Card!  I hope you'll pop on over and take a peek!
 I'm not sure if you have snow on the ground, but I just received a fresh dusting where I live a few days ago.  Have you ever seen a snowflake up close, maybe stuck to a window…each one is beautiful, inspirational and unique.  These swirly snowflake stamps and dies are so unique because, they really have so many different combinations too.
I hope you give it a try!
I've listed the products below, used to create this project.  Thanks so much for stopping by, I really appreciate you taking the time and have a wonderful day! xx

Bobbi

I've listed the products below, used to create this project.  I am part of various affiliate programs including Simon Says Stamp.  When you click on an affiliate link and make a purchase (at no extra cost to you), I receive a small commission.  Thank you, I genuinely appreciate your support!

Monday, February 12, 2018

Hello Love Valentine Card w/Ranger Ink...

Hi everyone, thanks so much for stopping by today!  I have a guest tutorial post to share with you over on the Ranger Ink blog.  I'll show you step-by-step how I created this fun ombre Hello Love Valentine Card!  I hope you'll pop on over and take a peek!


 I've listed the products below, used to create this project.  I really appreciate your kind comments and I hope you have a wonderful day! xx

Bobbi

I've listed the products below, used to create this project.  I am part of various affiliate programs including Simon Says Stamp.  When you click on an affiliate link and make a purchase (at no extra cost to you), I receive a small commission.  Thank you, I genuinely appreciate your support!

Friday, February 2, 2018

Creativations 2018 - Tim Holtz Blog Hop and Give Away!

Hi everyone, thanks so much for stopping by today!  I'm so excited to be a part of the Creativations 2018 - Tim Holtz Blog Hop and Give Away!  You should have arrived here from Joy's blog - if you didn't you may want to go back and check out all of the wonderful inspiration!  I'd like to share a project that I created for Tim Holtz's Stampers Anonymous booth at Creativation (formerly-CHA) 2018 this year.  I was so grateful to be asked to make a few things for Tim.  I'm sharing my "Collections Card" made with the New Tim Holtz Stampers Anonymous Entomology & Merchant Stamp Sets.
I can think of soooooo many ways I want to use these great stamp sets!!!
Tim Holtz Stampers Anonymous Entomology Stamp Set CMS328 (available now)
Tim Holtz Stampers Anonymous Merchant Stamp Set CMS331 (available February)

To start with I colorize a sheet of Distress Watercolor Cardstock with Pumice Stone and Frayed Burlap Distress Stains.  I stamped the background with the background writing stamp from the New Entomology set using Black Soot Archival Ink.
Then I heat embossed one of the bugs from the New Entomology set using Ranger Super Fine Black embossing powder onto a large tile of Mica.  You can easily find mica on Amazon, just search "Mica Tile", US Artquest has many different sizes to chose from.  I used an anti-static pouch on my mica before embossing, it helps a great deal.  I also handled the mica as little as possible before heat embossing.  The mica will pick up the natural oils from fingers and embossing powder will stick in places you won't want.  If that happens, just use a small dry paint brush on mica before heating embossing powder to melt.
I distressed idea-ology nailheads and an observation word band with picket fence distress crayon, pumice stone distress paint and mushroom alcohol ink.  Nailheads were adhered to top of mica with distress collage medium, then micas was adhered to card front with black foam squares directly under nailheads.  The nailheads hide the foam squares and appears that mica is floating on surface of card front.  The observation word band is attached using a little eclectic elements craft thread.
I cut a small strip of distress watercolor cardstock and lightly colorize with pumice stone and frayed burlap distress stains.  Then stamped #79 1/2 from Merchant Stamp Set with black soot archival ink.  I mounted stamped strip to a larger strip of idea-ology textured surfaces burlap.  A little messy stitching tied it all together.
My card base is a 5 1/2 x 8 1/2 sheet of kraft cardstock folded 4 1/4 x 5 1/2 to create an A2 card.  A sheet of black paper stash classic kraft stock was mounted to card base.  Then I mounted the assembled card front to the black kraft.
I hope you'll give it a try!

GIVE AWAY DETAILS
PRIZES, PRIZES,PRIZES!
We have a few prizes to give away, just leave a comment on the different blog hop posts for a chance to win.  The more blogs you leave comments on, the better your chances of winning a giveaway! 
Comments must be posted by midnight PST on Tuesday, February 6th. 
Winners will be announced on Wednesday, February 7th on Richele's blog
Good luck and happy hopping!
photo credit:  Richele Christensen

Here is the complete list of our Creativations 2018 - Tim Holtz Blog Hop and Give Away blog hoppers!

IDEA-OLOGY

SIZZIX

STAMPERS ANONYMOUS 


Just incase you've missed anything, head back over to Paula's blog and start again!  I know I'll be checking out all of the incredibly talented awesome designers many times, they're ALL amazing!

You can find the supplies I've used via the links below.  If you have any questions please let me know I love your kind comments, I truly appreciate each and everyone of them!

Bobbi

I've listed the products below, used to create this project.  I am part of various affiliate programs including Simon Says Stamp.  When you click on an affiliate link and make a purchase (at no extra cost to you), I receive a small commission.  Thank you, I genuinely appreciate your support!