Hi everyone! It's Compendium of Curiosities III Challenge #22 time! Our hostess for CC3C is non other than the awesome
Linda Ledbetter. This challenge is found on page 62 of
Tim Holtz's Compendium of Curiosities Volume Three book. If you don't have this great book you can find it
here and Tim Holtz will even sign it for you!!! This challenge is sponsored by
The Funkie Junkie Boutique who have a wonderful $25 gift voucher to give away to one lucky winner. Also, the Curiosity Crew Pick wins a fabulous pack of goodies from
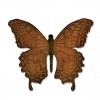
Tim and Mario! Now, here is my take on this "Dimensional Cutting Pad" challenge! I made a butterfly cameo frame!

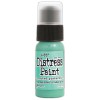
Now, I can't give away Tim's fabulous challenge techniques but I can tell you all the other details about my project! To start with I cut two pieces of chipboard out with Tim's cameo and sized oval dies. I gave them a couple coats of pumice stone distress paint and let that dry. Then I went back to give it that really distressed a look with just a touch of black soot paint, barely skimming across the surface.
You don't want a heavy application so make sure the foam applicator is really dry. I just blotted with a paper towel to take away the excess paint. Then, I set the cameo frames aside to dry.
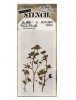
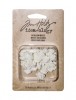
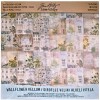
To add even more dimensions I die cut some vellum mini butterflies and distressed them with mushroom alcohol ink.
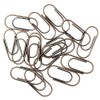
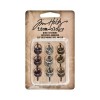
The cash key, ring fastener and nature spray idea-ology pieces were distressed with iced sruce and pumice stone distress paint then mushroom alcohol ink on top of that.
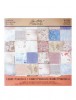
I took the O-ring off of the ring faster and attached the cash key and reassembled. It just laid better that way, with how I was using it. I cut out a small piece of the correspondence paper and applied a remnant rub. Tim's new remnant rub tool is worth it's weight in gold, I just love that little gadget!
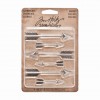
I painted an heirloom rose and three long fasteners with mustard seed distress paint and let dry. Then I used a little mushroom alcohol ink and added a little grunge.
I glued the heirloom rose to the nature spray with glossy accents.
I added some splatters to the frame and all the butterflies, using picket fence and mustard seed distress paint. That funny looking tool to the left is a Liquitex freestyle flat splatter brush. Tim Holtz had used it on some projects a while back and it intrigued me. I have used many things to make splatters over the years and this is by far the easiest to use. If you're anything like me...previous to using this tool I would cover half my work area to make sure I didn't get splatters where they were not wanted. This little gem is much more target isolated.
Splatters to the vellum butterflies as well.
I attached the vellum mini butterflies to the dimensional cutting pad mini butterflies, then attached the long fasteners. I also attached the cash key and ring fastener to the bottom of the cameo frame.
To give it a finished look I attached the second cameo frame to the back of the first cameo frame.
You can see the wonderful dimension that this unique cutting pad gives to your project. It was so much fun, you should give it a try!
Remember to enter your "Love is in the Air" themed projects over at
Inspiration Journal and one lucky winner will be given a very generous $50 gift credit, to spend at
Inspiration Emporium. You can find all the supplies I used at
Inspiration Emporium via the links below. Remember to use my coupon code -
vintagemuse - to save 10% on your order. I hope you enjoyed my Dimensional Cutting Pad project! If you have any questions or if there's anything I missed please let me know I love your comments, I appreciate each and everyone of them! As always thanks for stopping by and I'll see you next time!